Add new products to your store
This chapter teaches you how to add new products and categories to your store. It explains the major entities like categories, pricing & products required to show some products in the storefront app.
This tutorial helps you to ...
- Log into your Admin UI
- Fill your store with content using the Admin UI
- Understand the store's data entities
- Use graphQL queries and mutations to feed and search over the Unchained Engine api.
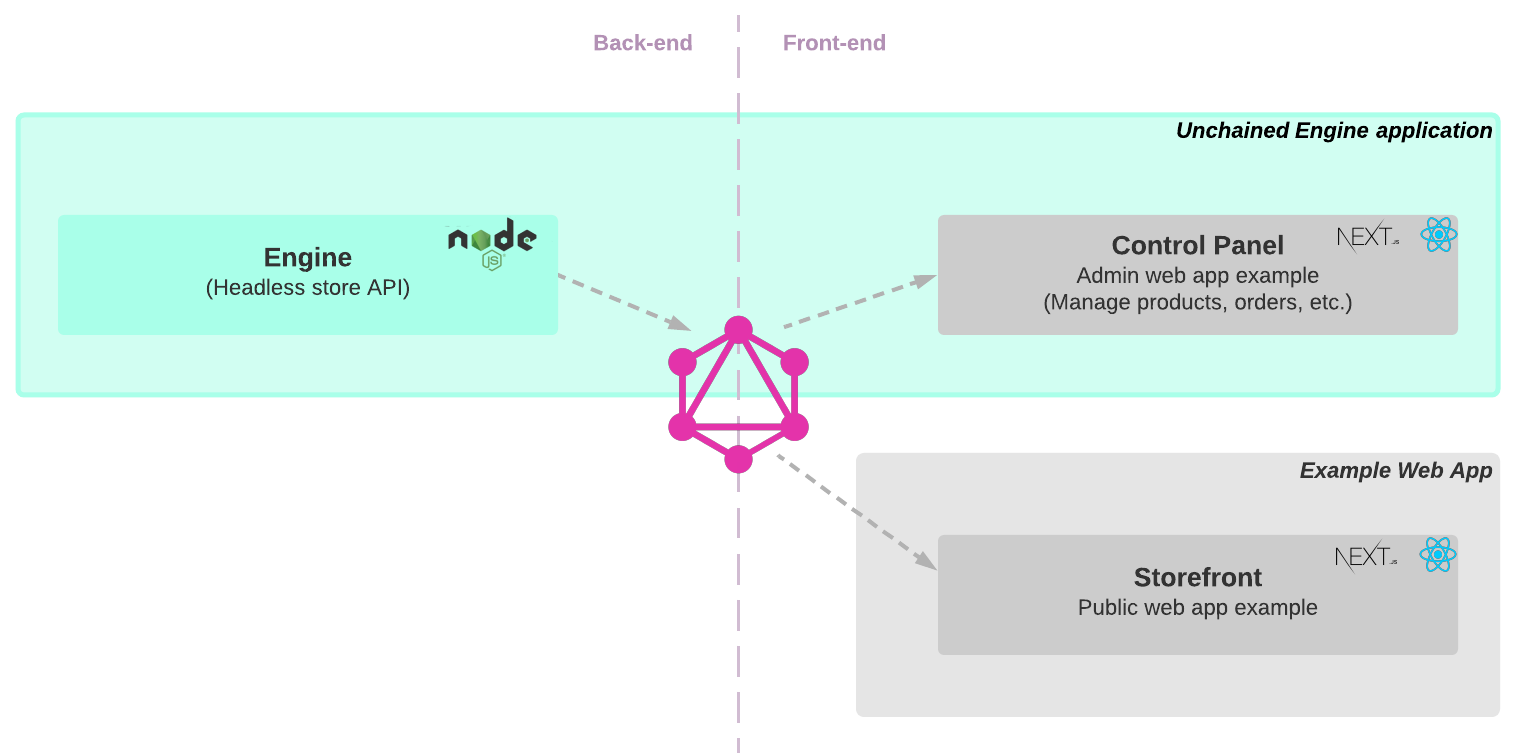
This is an example application of a management admin UI.
The Unchained Engine is designed for professional enterprise applications and uses powerful plugins to connect to existing CRM solutions which should be the choice if you build the store.
However, to start we can manage a simple shop catalogue and add a basic payment option using the provide Admin UI.
Step 1: Access Admin UI
In order to add content to your store, you need to log into the store's admin UI sandbox. By default the sandbox is pointed to your localhost:4010 port but in case you change the local engine endpoint to something else you can simply change the ENDPOINT URL
Navigate to the login window of your admin UI
Initially the username and password are set as following:
Username: admin@unchained.local
Password: password
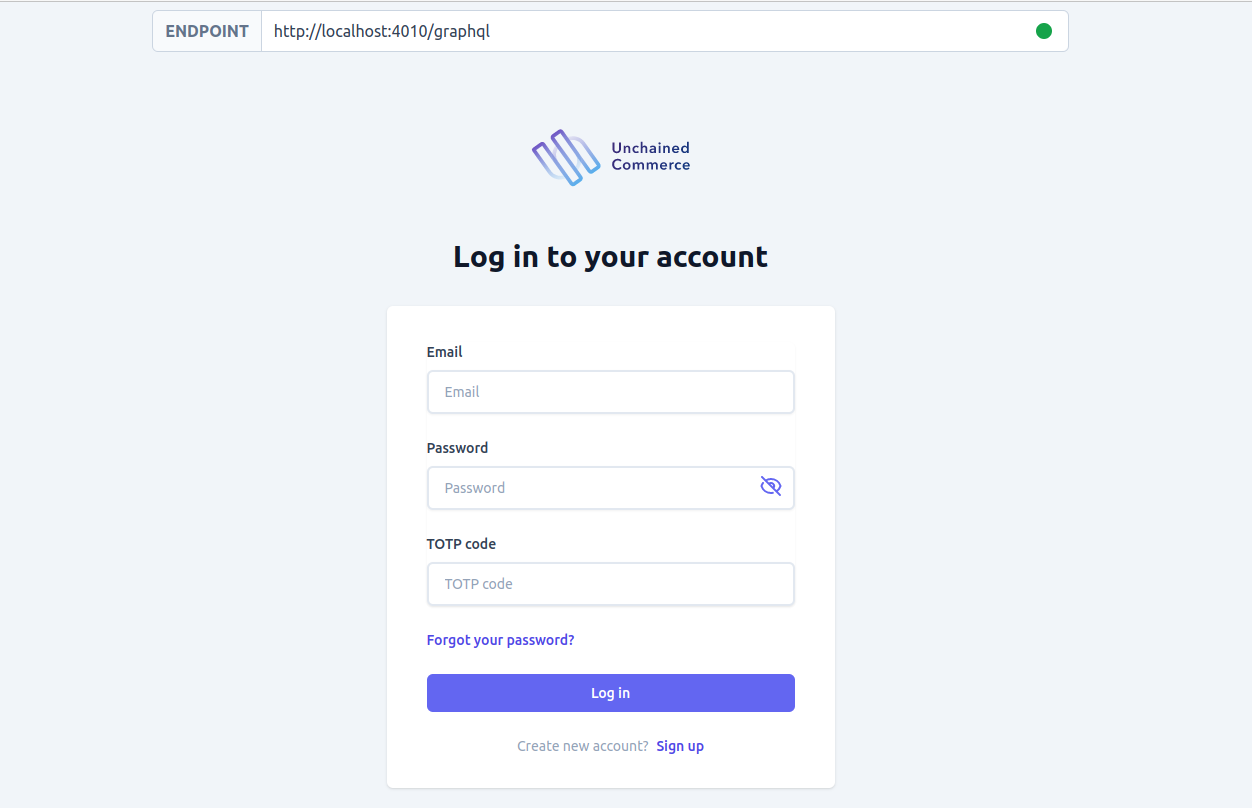
This is a test project using common hard-coded credentials. Change your password as soon as you intend to work professionally with the engine. (Account ➤ Change password)
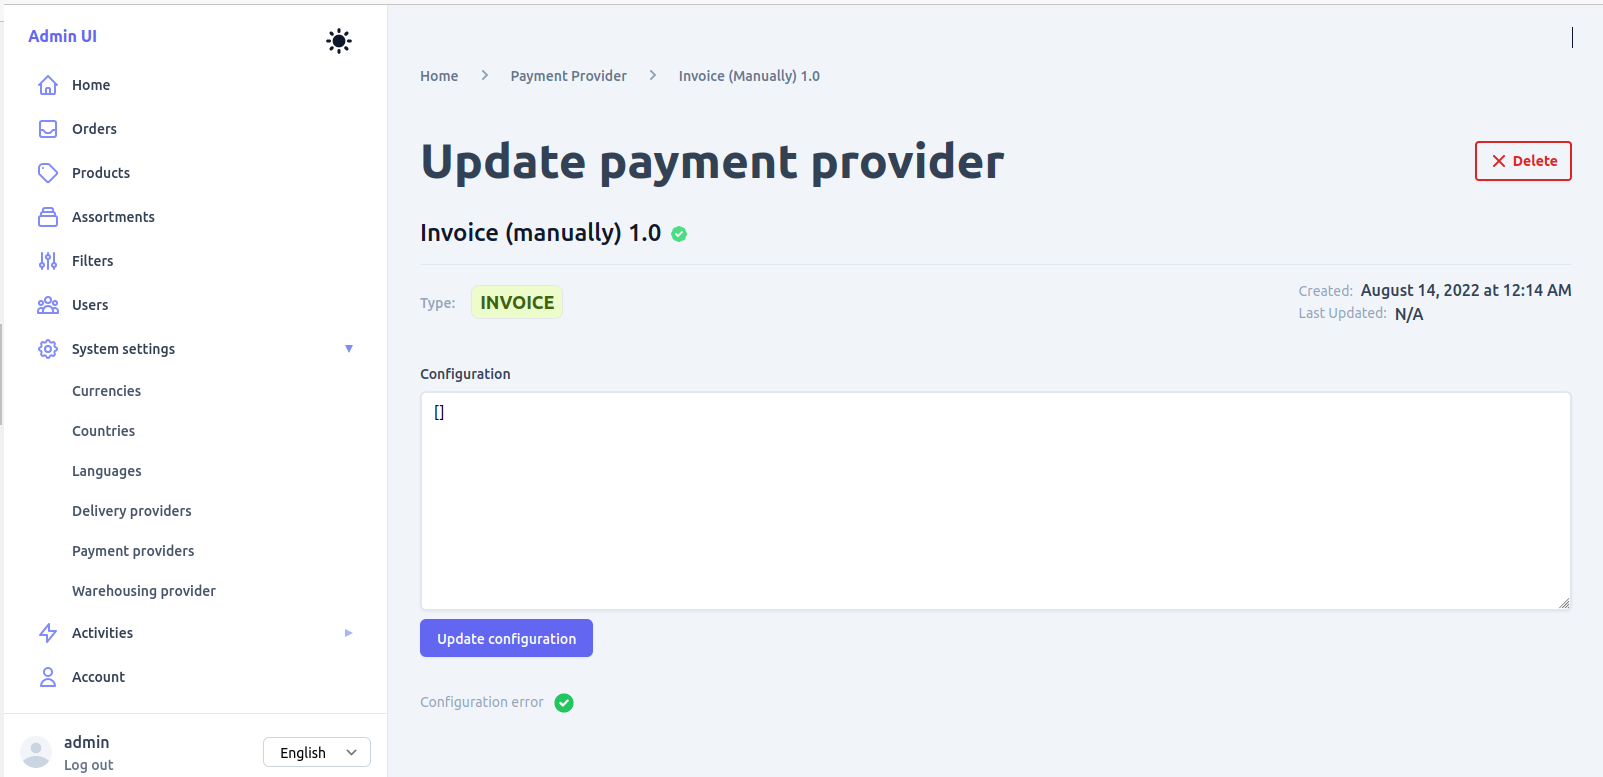
Step 1: Add Payment Provider
One of the basic settings besides the currency & language is the payment provider for your store. We gonna add a simple Pay per invoice method to our shop.
Check Further Reading at the end of this chapter for a (growing) list of payment plugins available for the Unchained Engine.
- On side navigation choose the menu entry
System setting➤Payment providers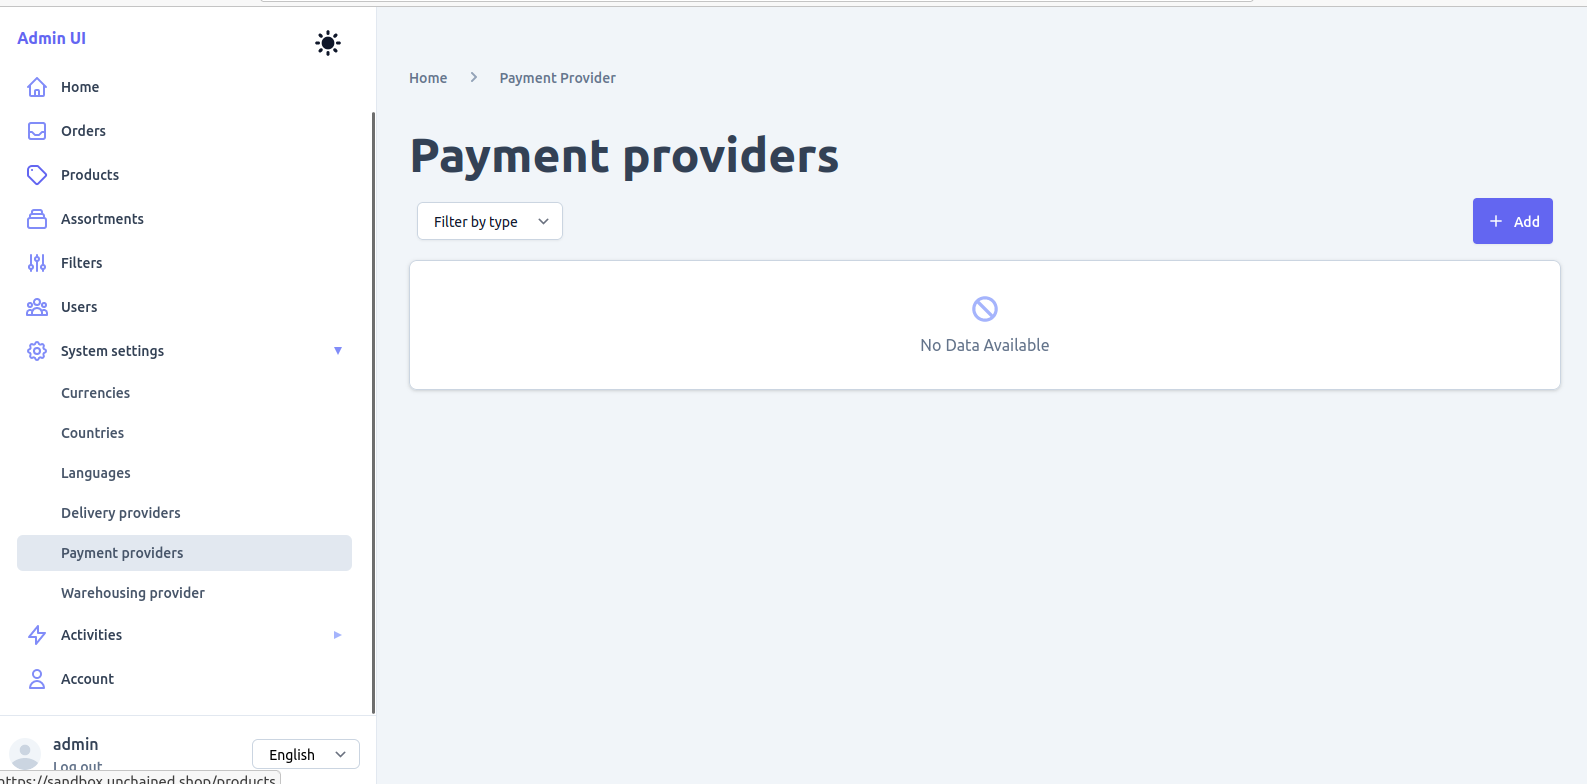
- Click on
Addin the empty list view. - Select type
Invoice, choose the adapterInvoice (manually)and click onAdd new adapterto save invoice payment provider.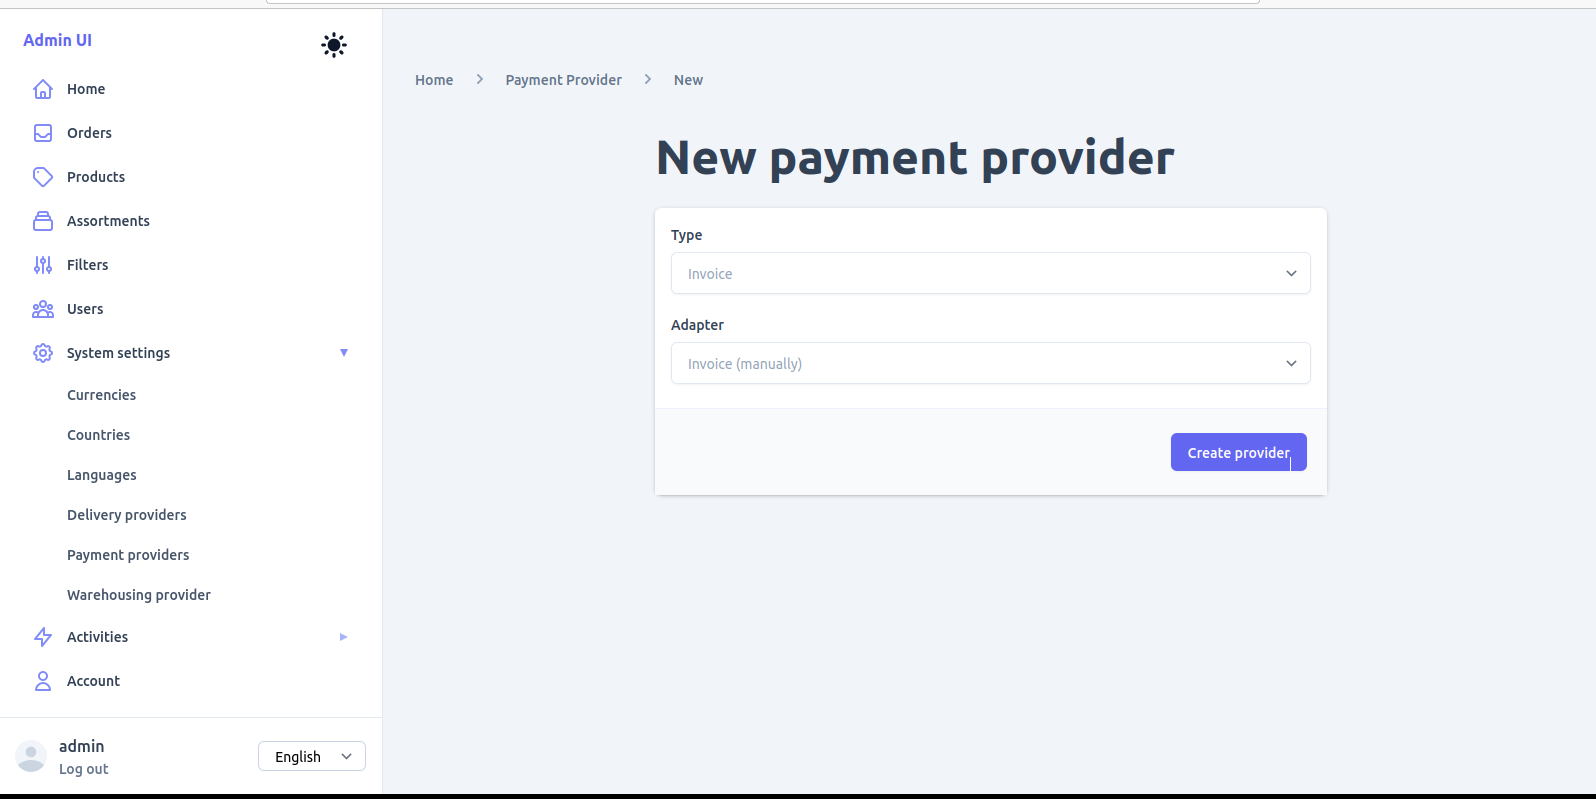
- Click
Savein the next screen as we do not need to add any additional configuration keys in this example project. - The new payment provider INVOICE page will open.
Step 2: Set Delivery Option
The second important configuration is delivery option which defines where and how orders should be send to for furhter processing.
- On top choose the menu entry
System settings➤Delivery providers - Click on
Addin the empty list view. - Select type
Shipping, choose the adapterForward Delivery via Messagingand click onAdd Delivery providerto continue.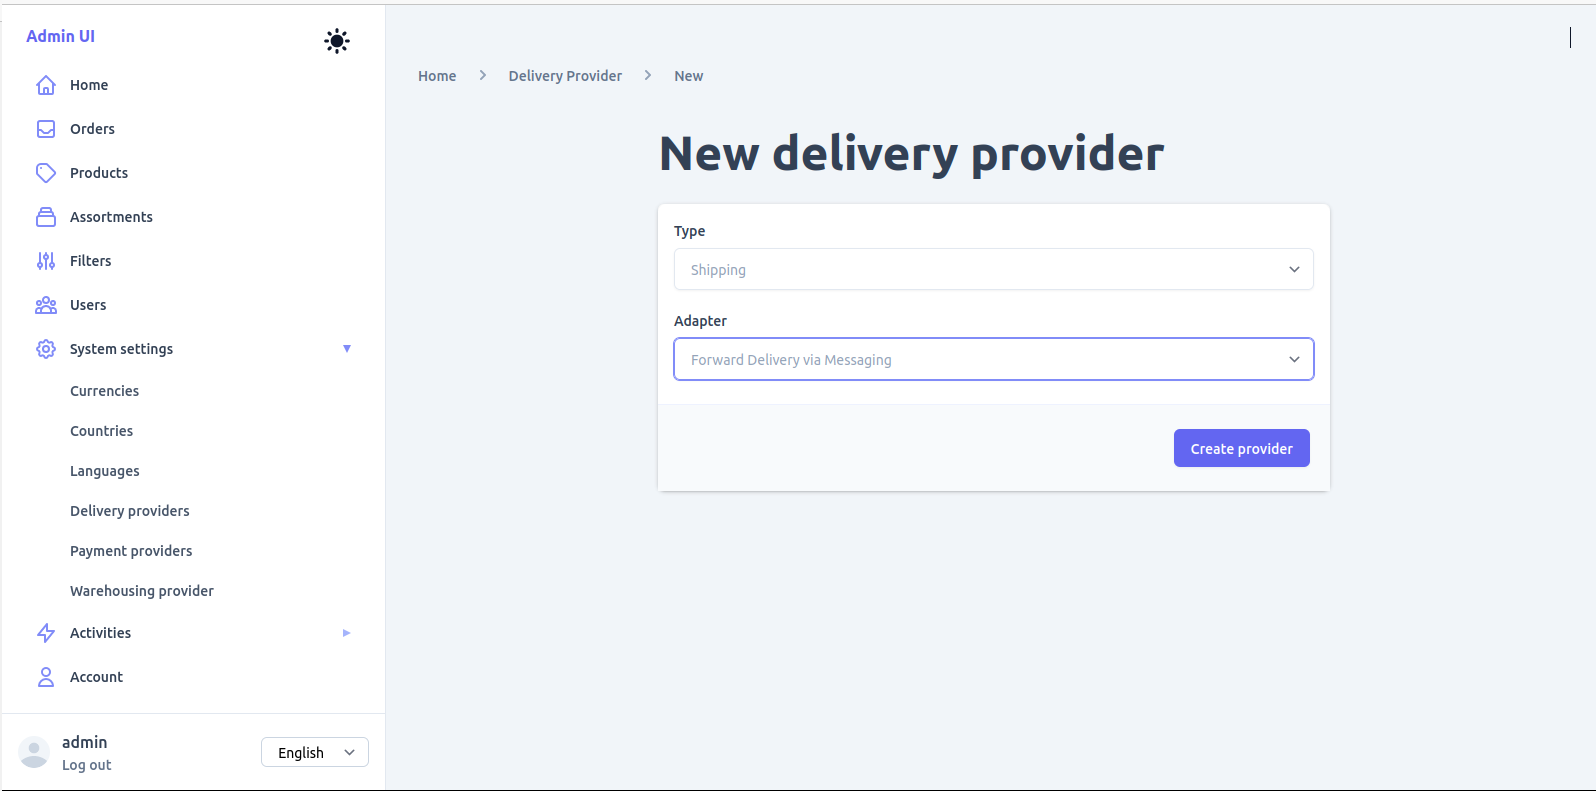
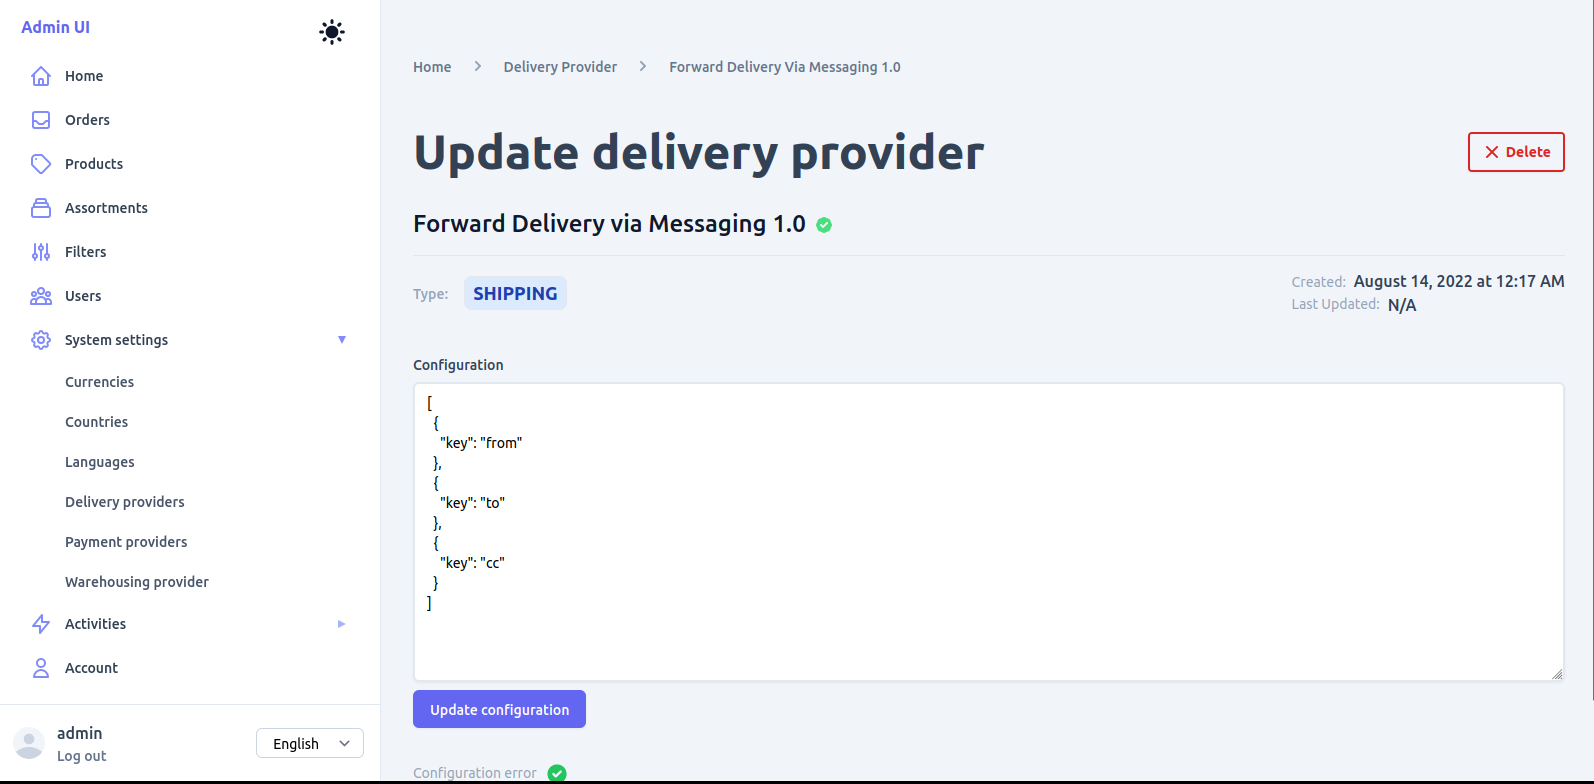
- In the configuration window set email addresses (can be non-existing phantom addresses) for the keys from and to, delete the cc key and click
Save. - The new delivery provider SHIPPING should appear in the list. (You might need to select the delivery list again in the top menu)
Step 3: Add Product
It's time to add our first product to the store.
- On side navigation menu entry
Products - Click on
Addin the empty product list. - Give the product a name and set the type to
Simple Product.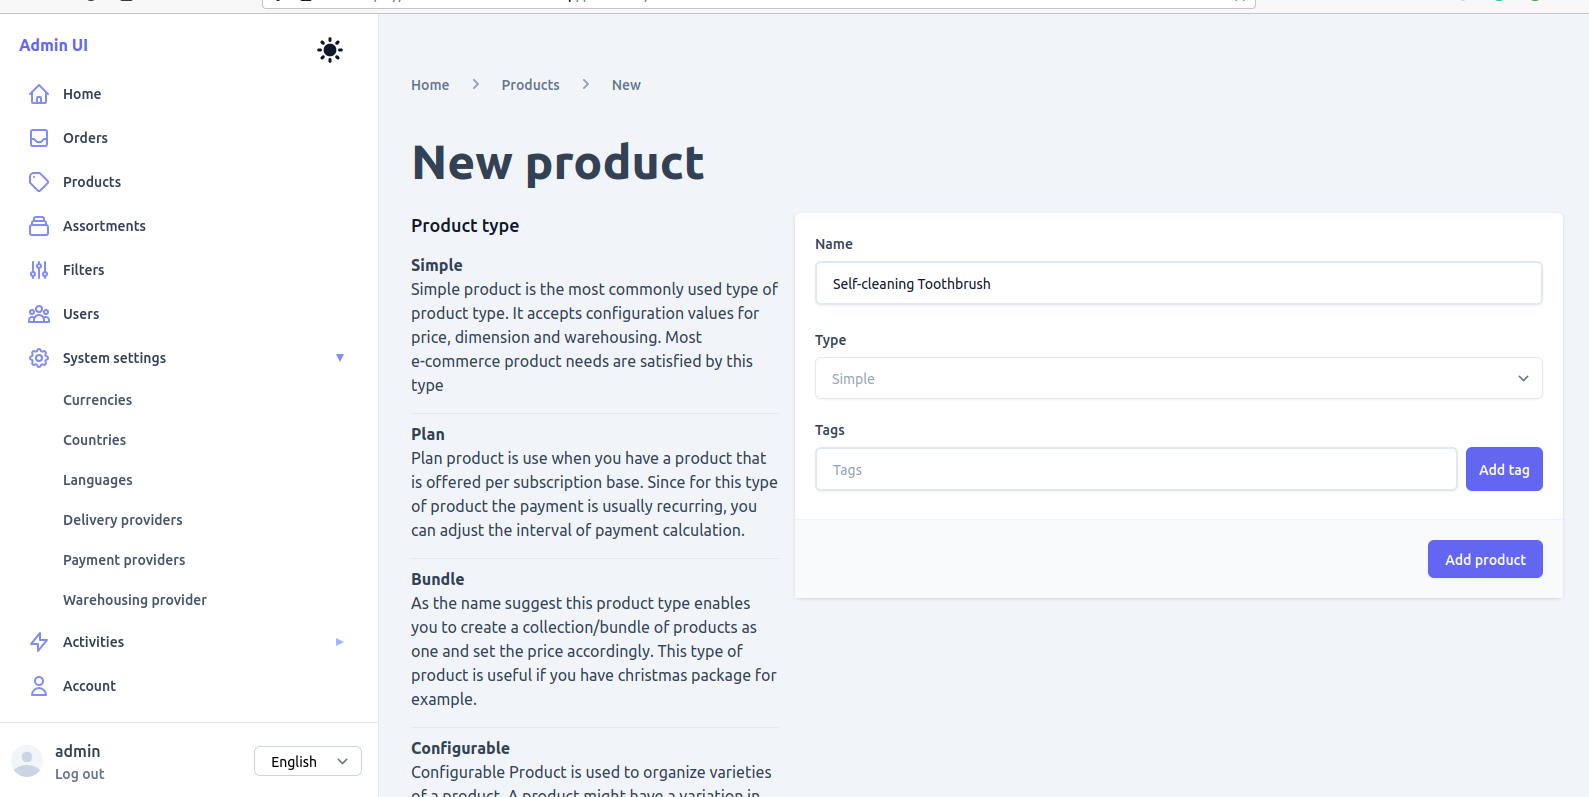
- Click
Add productto save the product and navigate to the product detail view. - (If you have one ready, add a nice product image under
Media.) - Select
Commerceon the left and set the price for your product. - Per default a product is in the state draft. To make it available in the shop we need to
publishit.
On the right you find the option to publish (and unpublish) to product.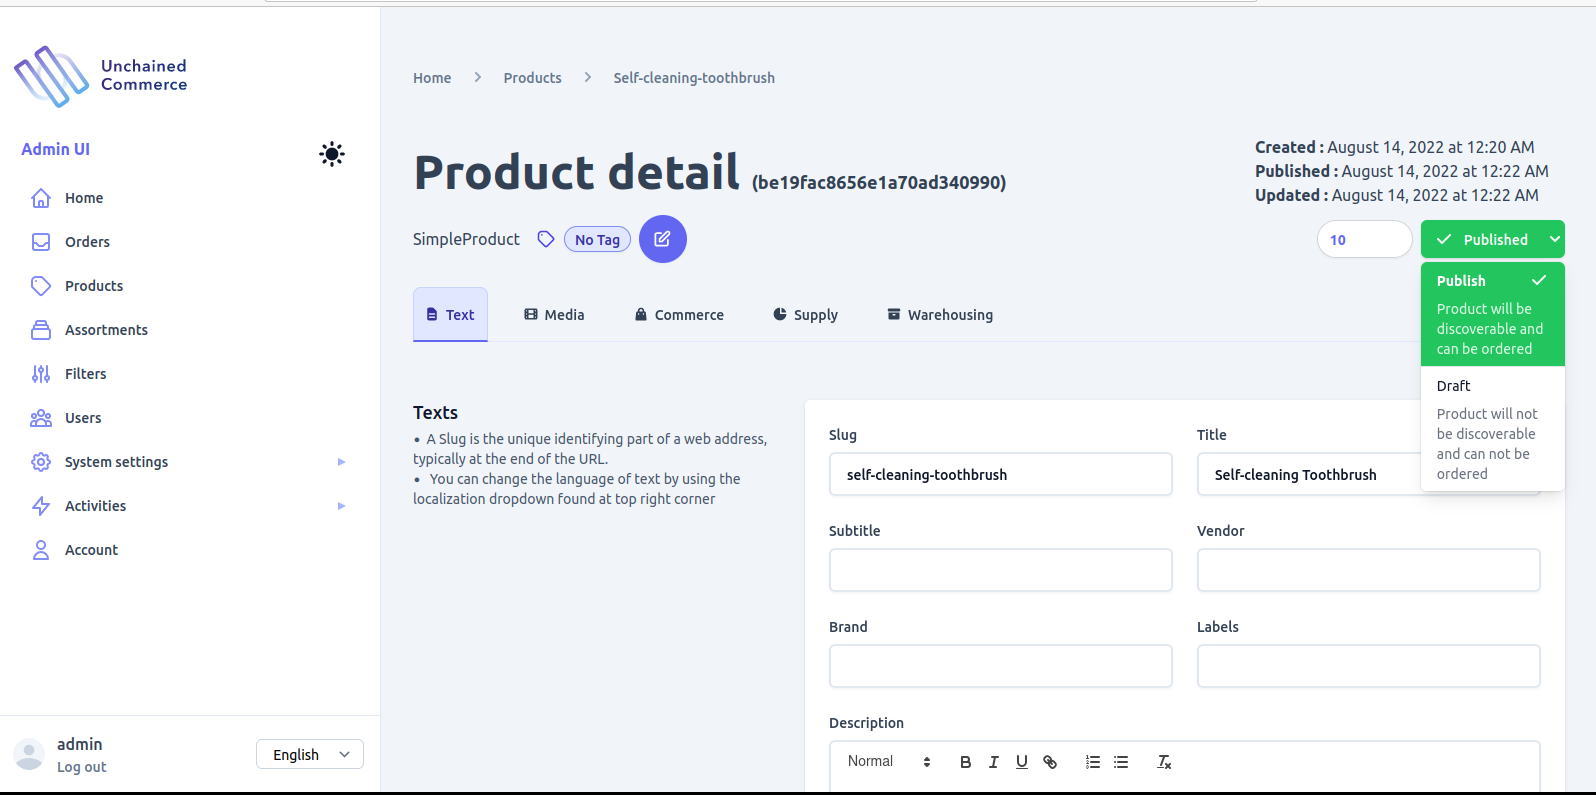
- Great! The product is ready to be assigned to a category.
- Do it again and add a second product!
Step 4: Create Category (Assortment) with Products
Firstly, we will add two new categories which are called Assortments in the Admin UI.
- On side navigation menu entry
Assortments. - Click on
Add.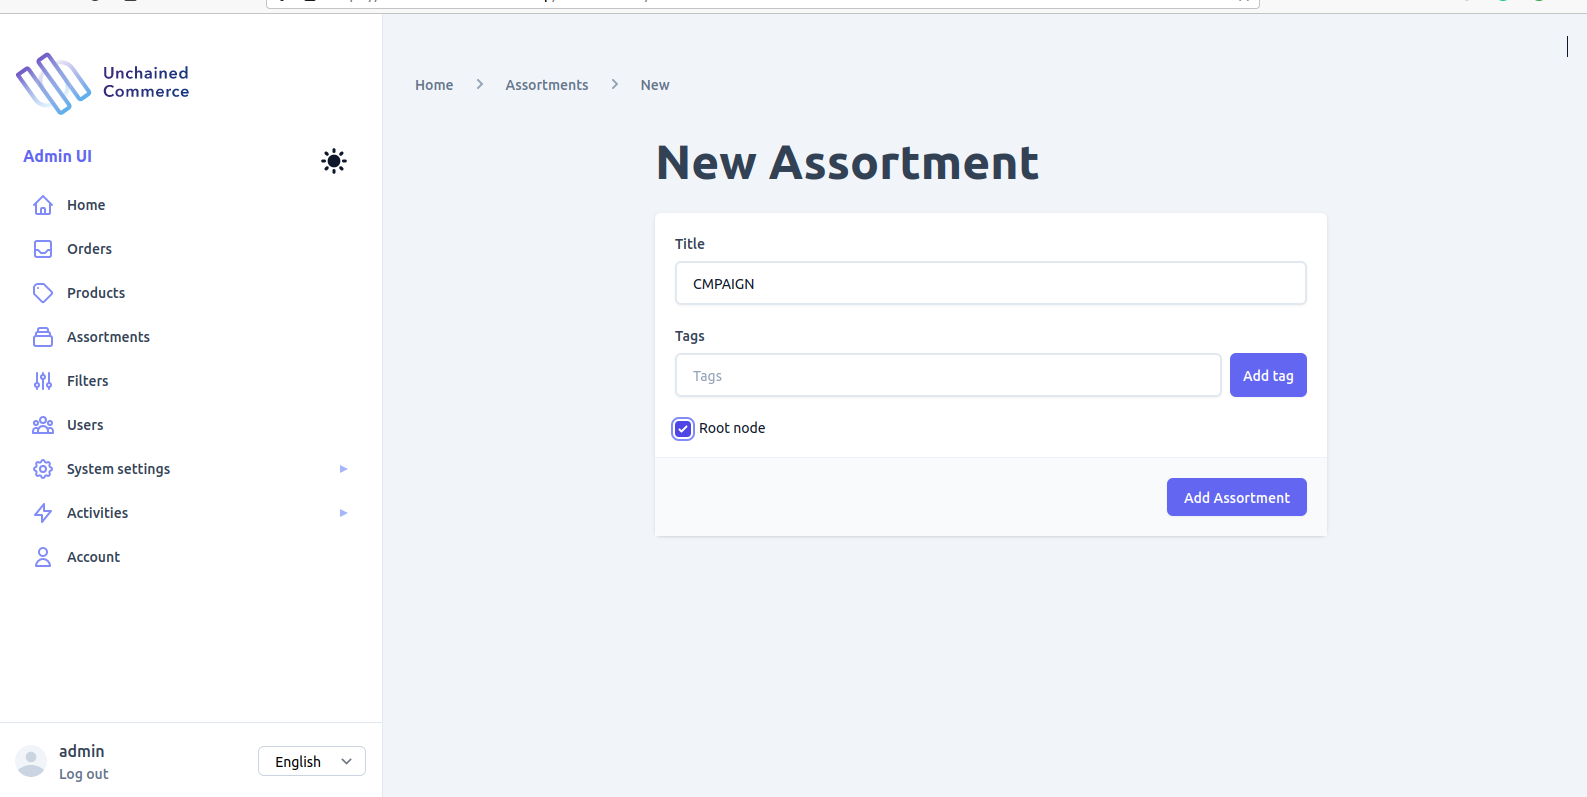
- Give your category a title, keep the root node option checked.
- Click
Add Assortmentto save the category and navigate to the category detail view. - (Same here, add a nice category image under
Media.)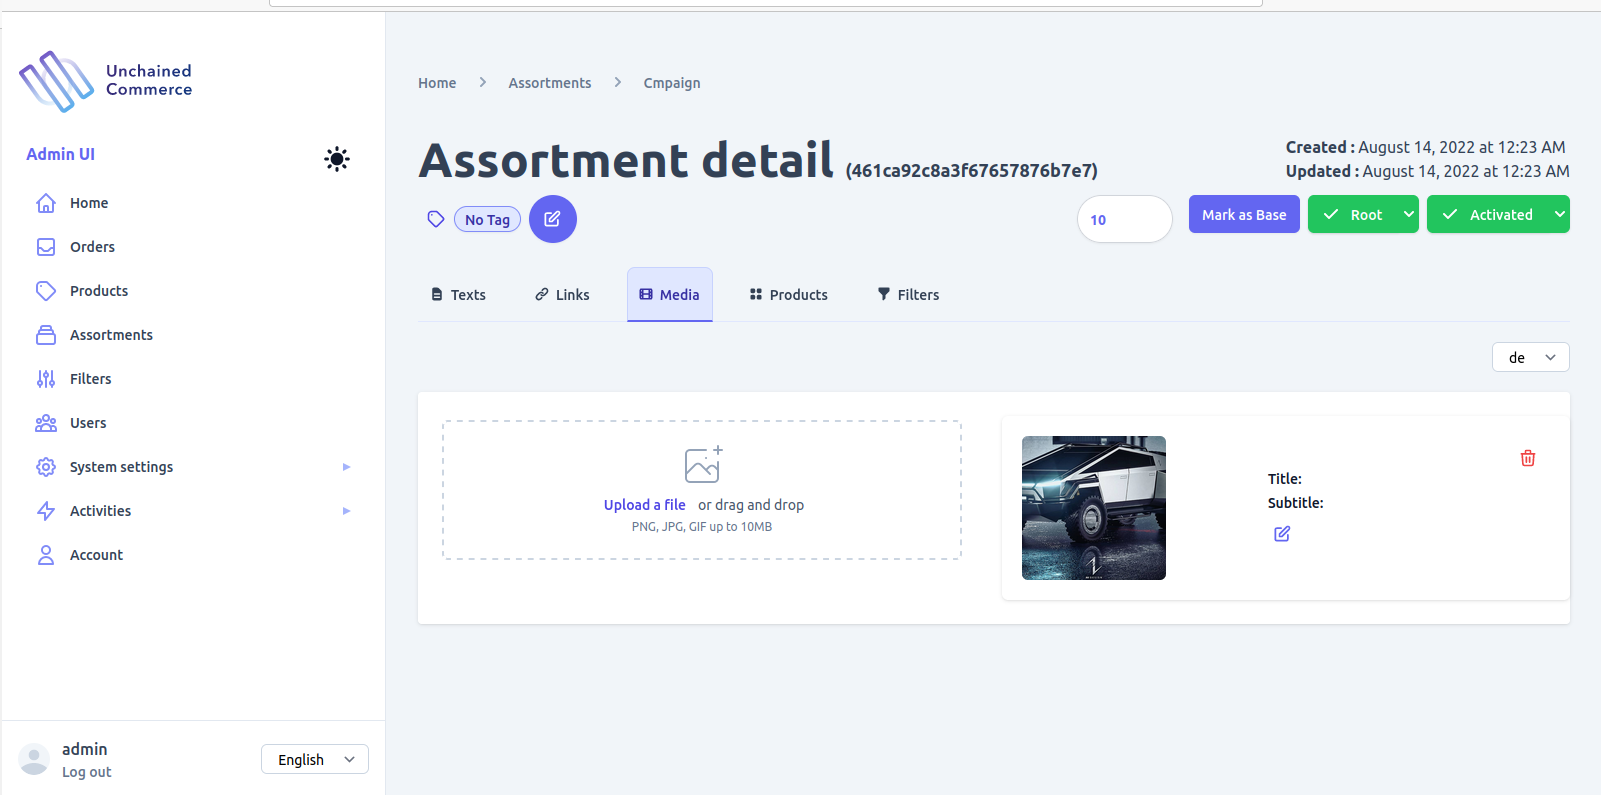
- Select
Productstab. - Search for the (exact) name of the product you added in Step 3, select it
and click
Add Productto link the product to the category
Step 5. Admire the Products
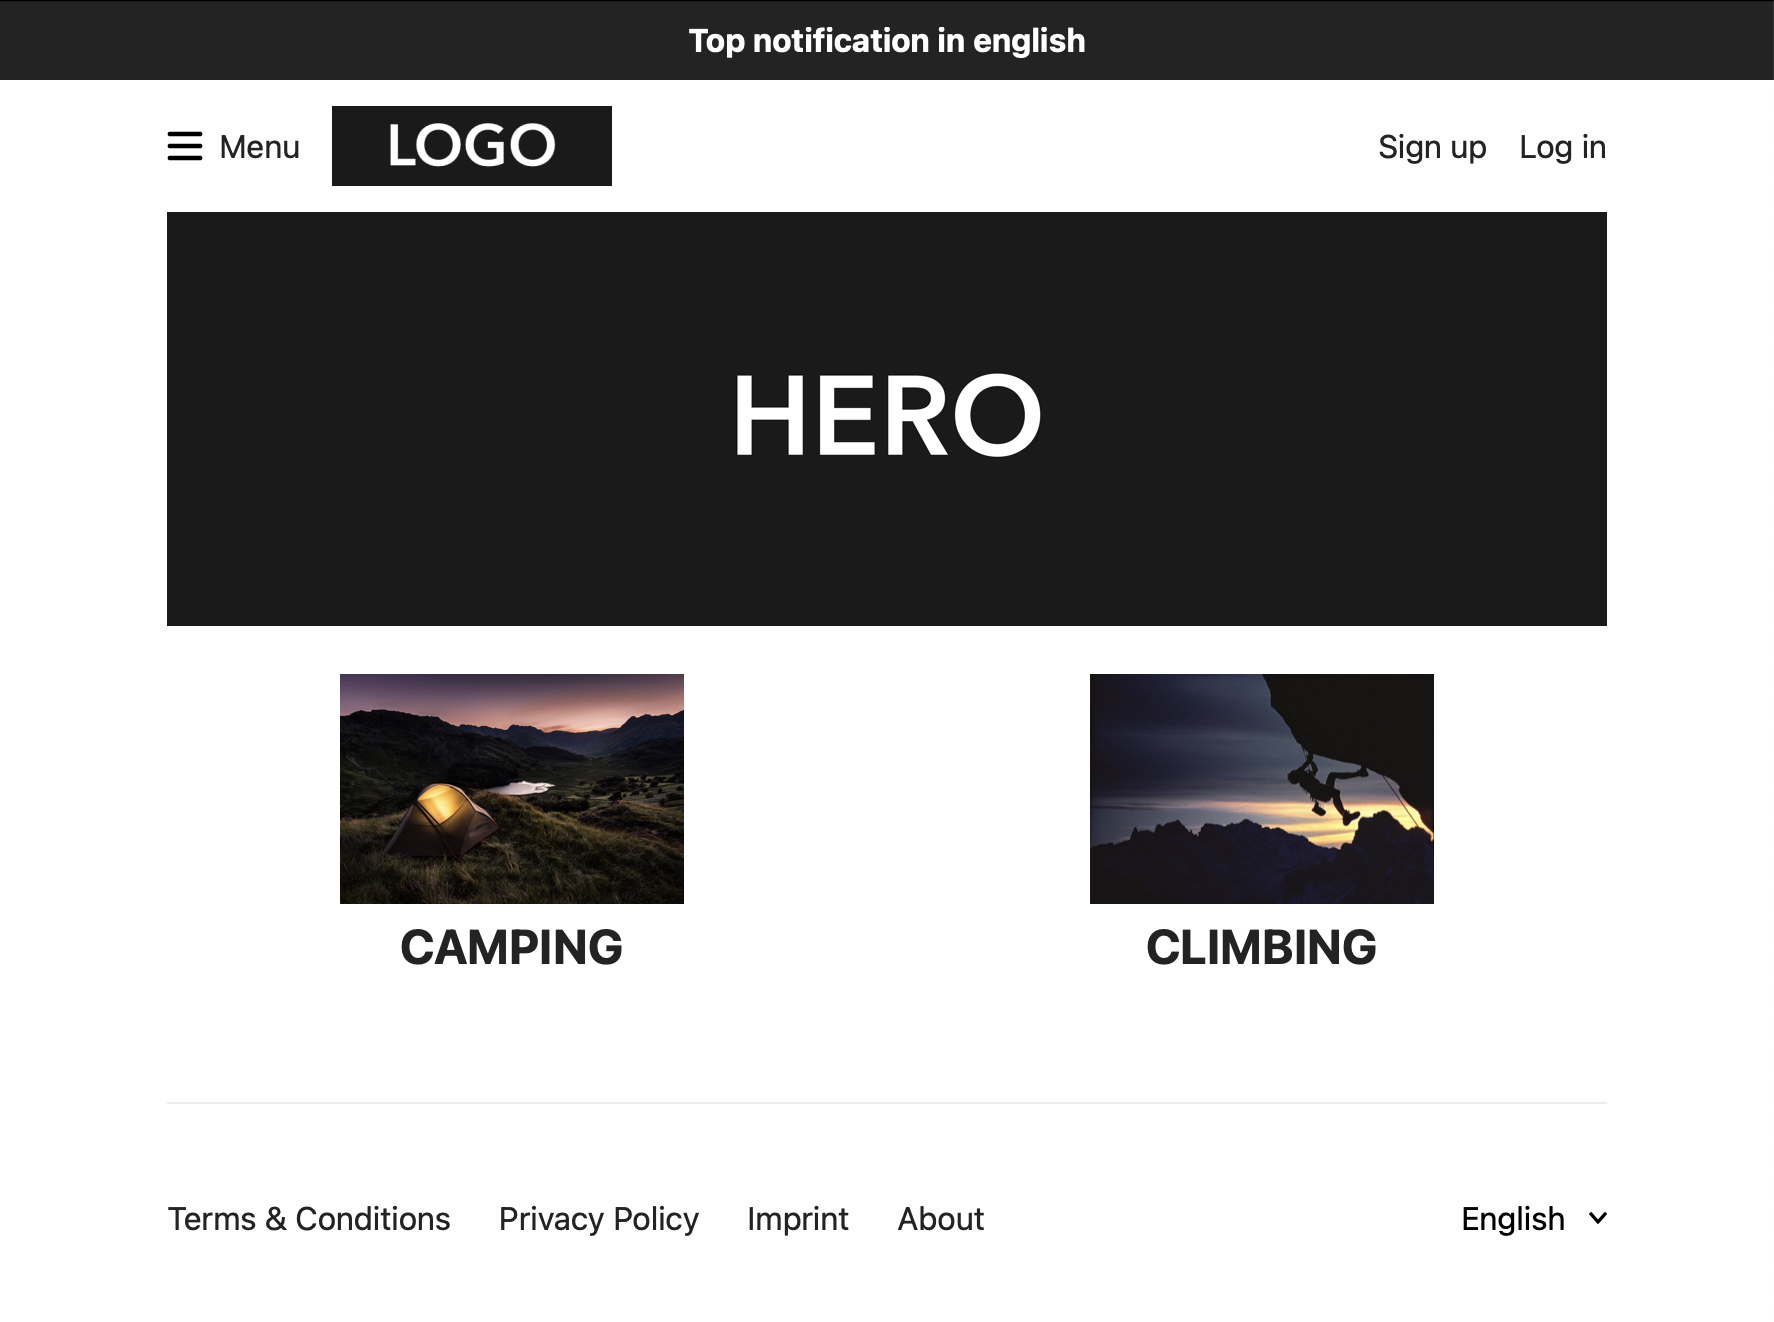
Open your local storefront app http://localhost:3000 and verify that the categories appear on the entry page. Choose a category to see the underlying products and start shopping! 😎
Step 6: Place an Order
Now, you are able to go through a complete check-out and buy a product with the pay-per-invoice payment method.
On successful completion of an order you will find a new entry in the Orders list and a detailed order view including the the Invoice Paid option.
Further Reading
Those are only the basic steps to fill some products into your store and process an order.
Check out further guides in the list below and do not hesitate to contact us if you need help 🍫!