/
Launch your Unchained Engine instance
This chapter explains how to launch your own Unchained Engine instance on our Unchained hosted service.
This tutorial will help you:
- Set up a hosted Unchained Engine
- Access the engine's Admin UI
Step 1: Sign-up for an Unchained account
In order to get a free cloud-hosted unchained instance, you need to sign up here.
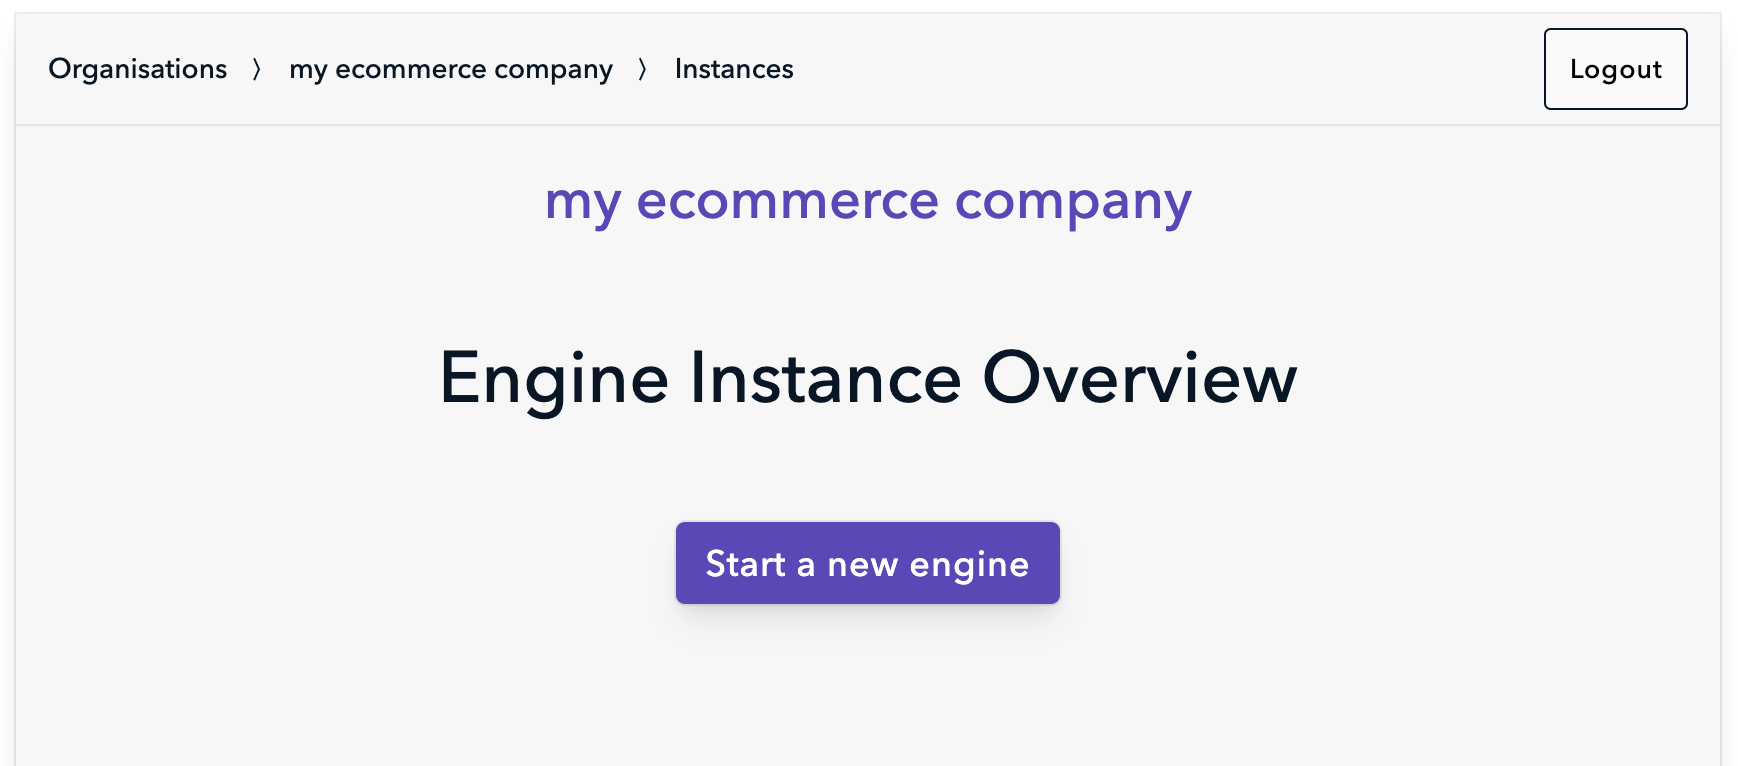
Step 2: Create a new Instance
- After registration you will be redirected to the create organsation page. Create one by entering your organisation's name and click Save organisation.
- The Instances Overview page is shown. Click on Start a new engine to proceed.
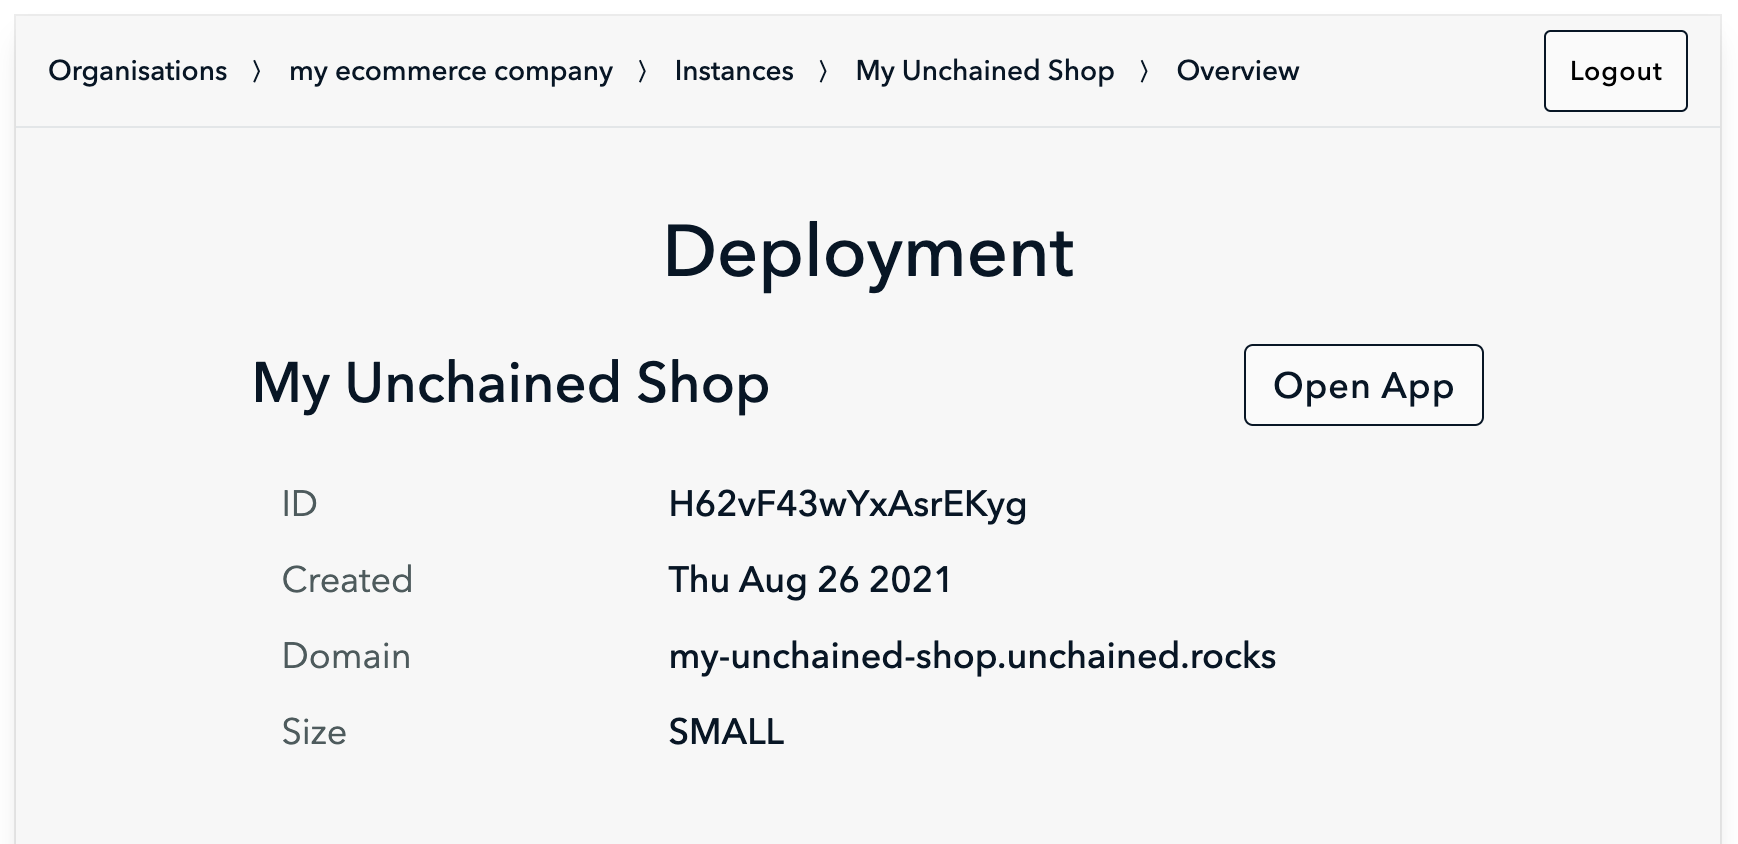
- Follow the steps, which prompt you to give your shop a name and set a email address to receive order confirmations.
Outgoing mails send to your customers use per default the unchained mail server and look like this noreply@unchained.shop .
However, there is the option to configure Advanced email settings which allow you to set your shop's sender email address using your SMTP mail server. - If all went well you will see the Instance Overview page after a few seconds.
Step 3: Verify engine
- Click on Open App in the Instance Overview page to navigate to the Admin UI under your engine's domain.
- The URL looks something like my-unchained-shop.unchained.rocks/sign-in
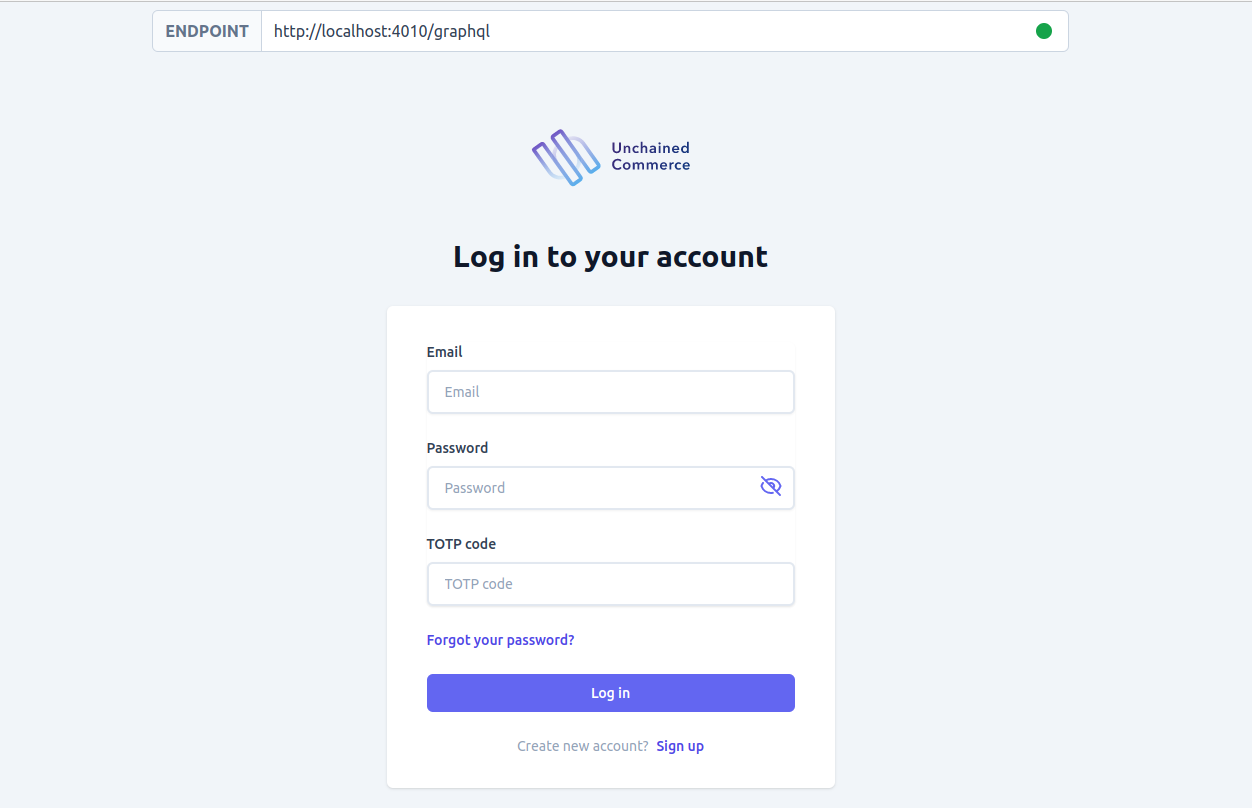
- You should see the login window of the Admin UI. DON'T TRY TO LOGIN YET, WE WILL GET TO THAT LATER
Congratulations! 👏🏻 Your Unchained Engine is up and running!