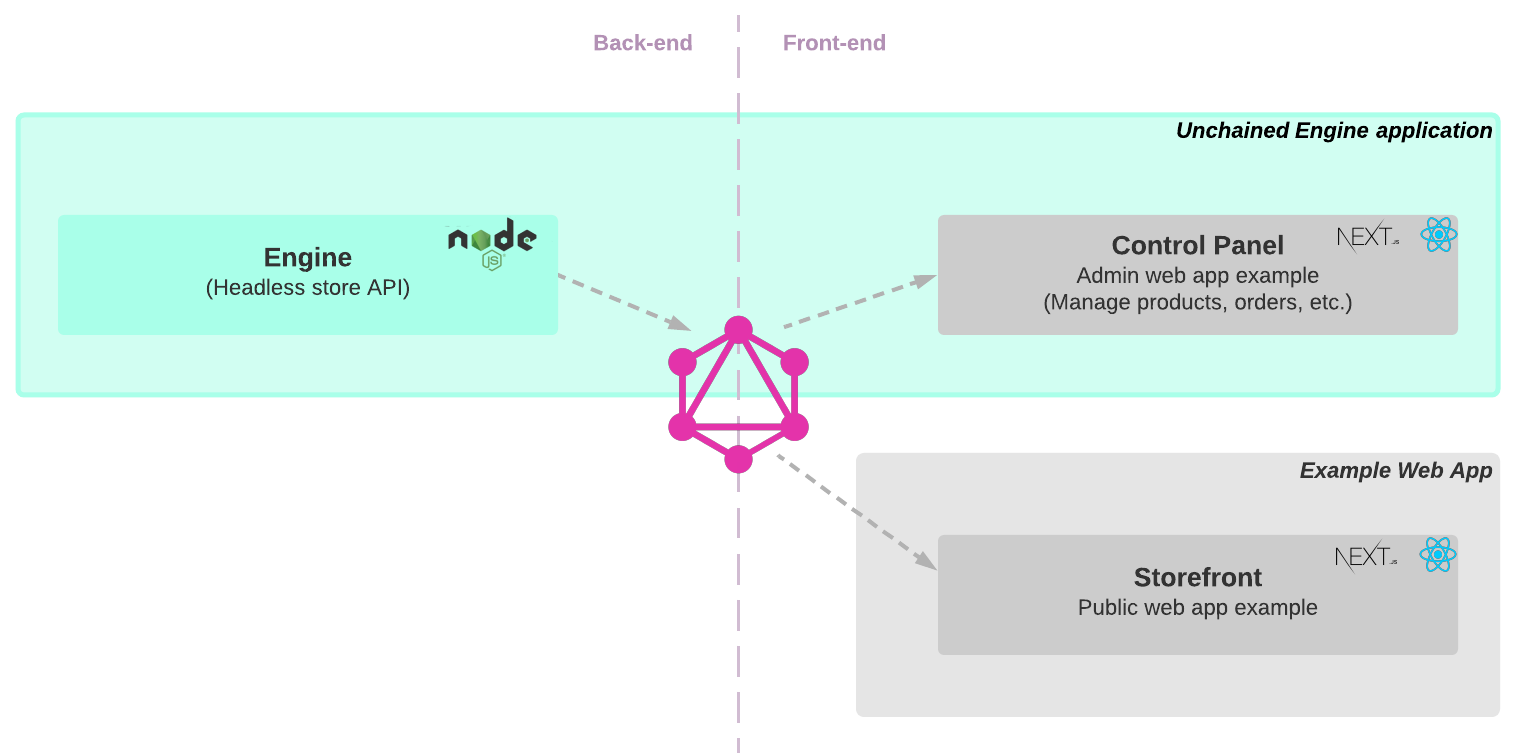
Deploy storefront with Vercel
In this section we will walk through on how to deploy your Storefront web app to Vercel
This tutorial helps you:
- Deploy your web storefront
- Publish the storefront under your domain (or subdomain)
Make sure you have successfully completed the Install storefront guide.
Step 1: Building the app
Before deploying we make sure our app bundles correctly by initiating a production build locally. Navigate to the storefront project and run the build command.
cd my-storefront-webapp

npm run build
This might take a moment. Once successful push everything to your git-repository.
git add .
git commit -m 'build version for deploy'
git push
If working on a specific branch, merge the branch into your master (or main) branch before continuing.
Step 2: Connect the git with Vercel account
Create a Vercal account here. Once logged in you should see the setup window for your initial project.
You will need to allow Vercel to access your git repository. Once the repository is connected you should end up in the following screen:
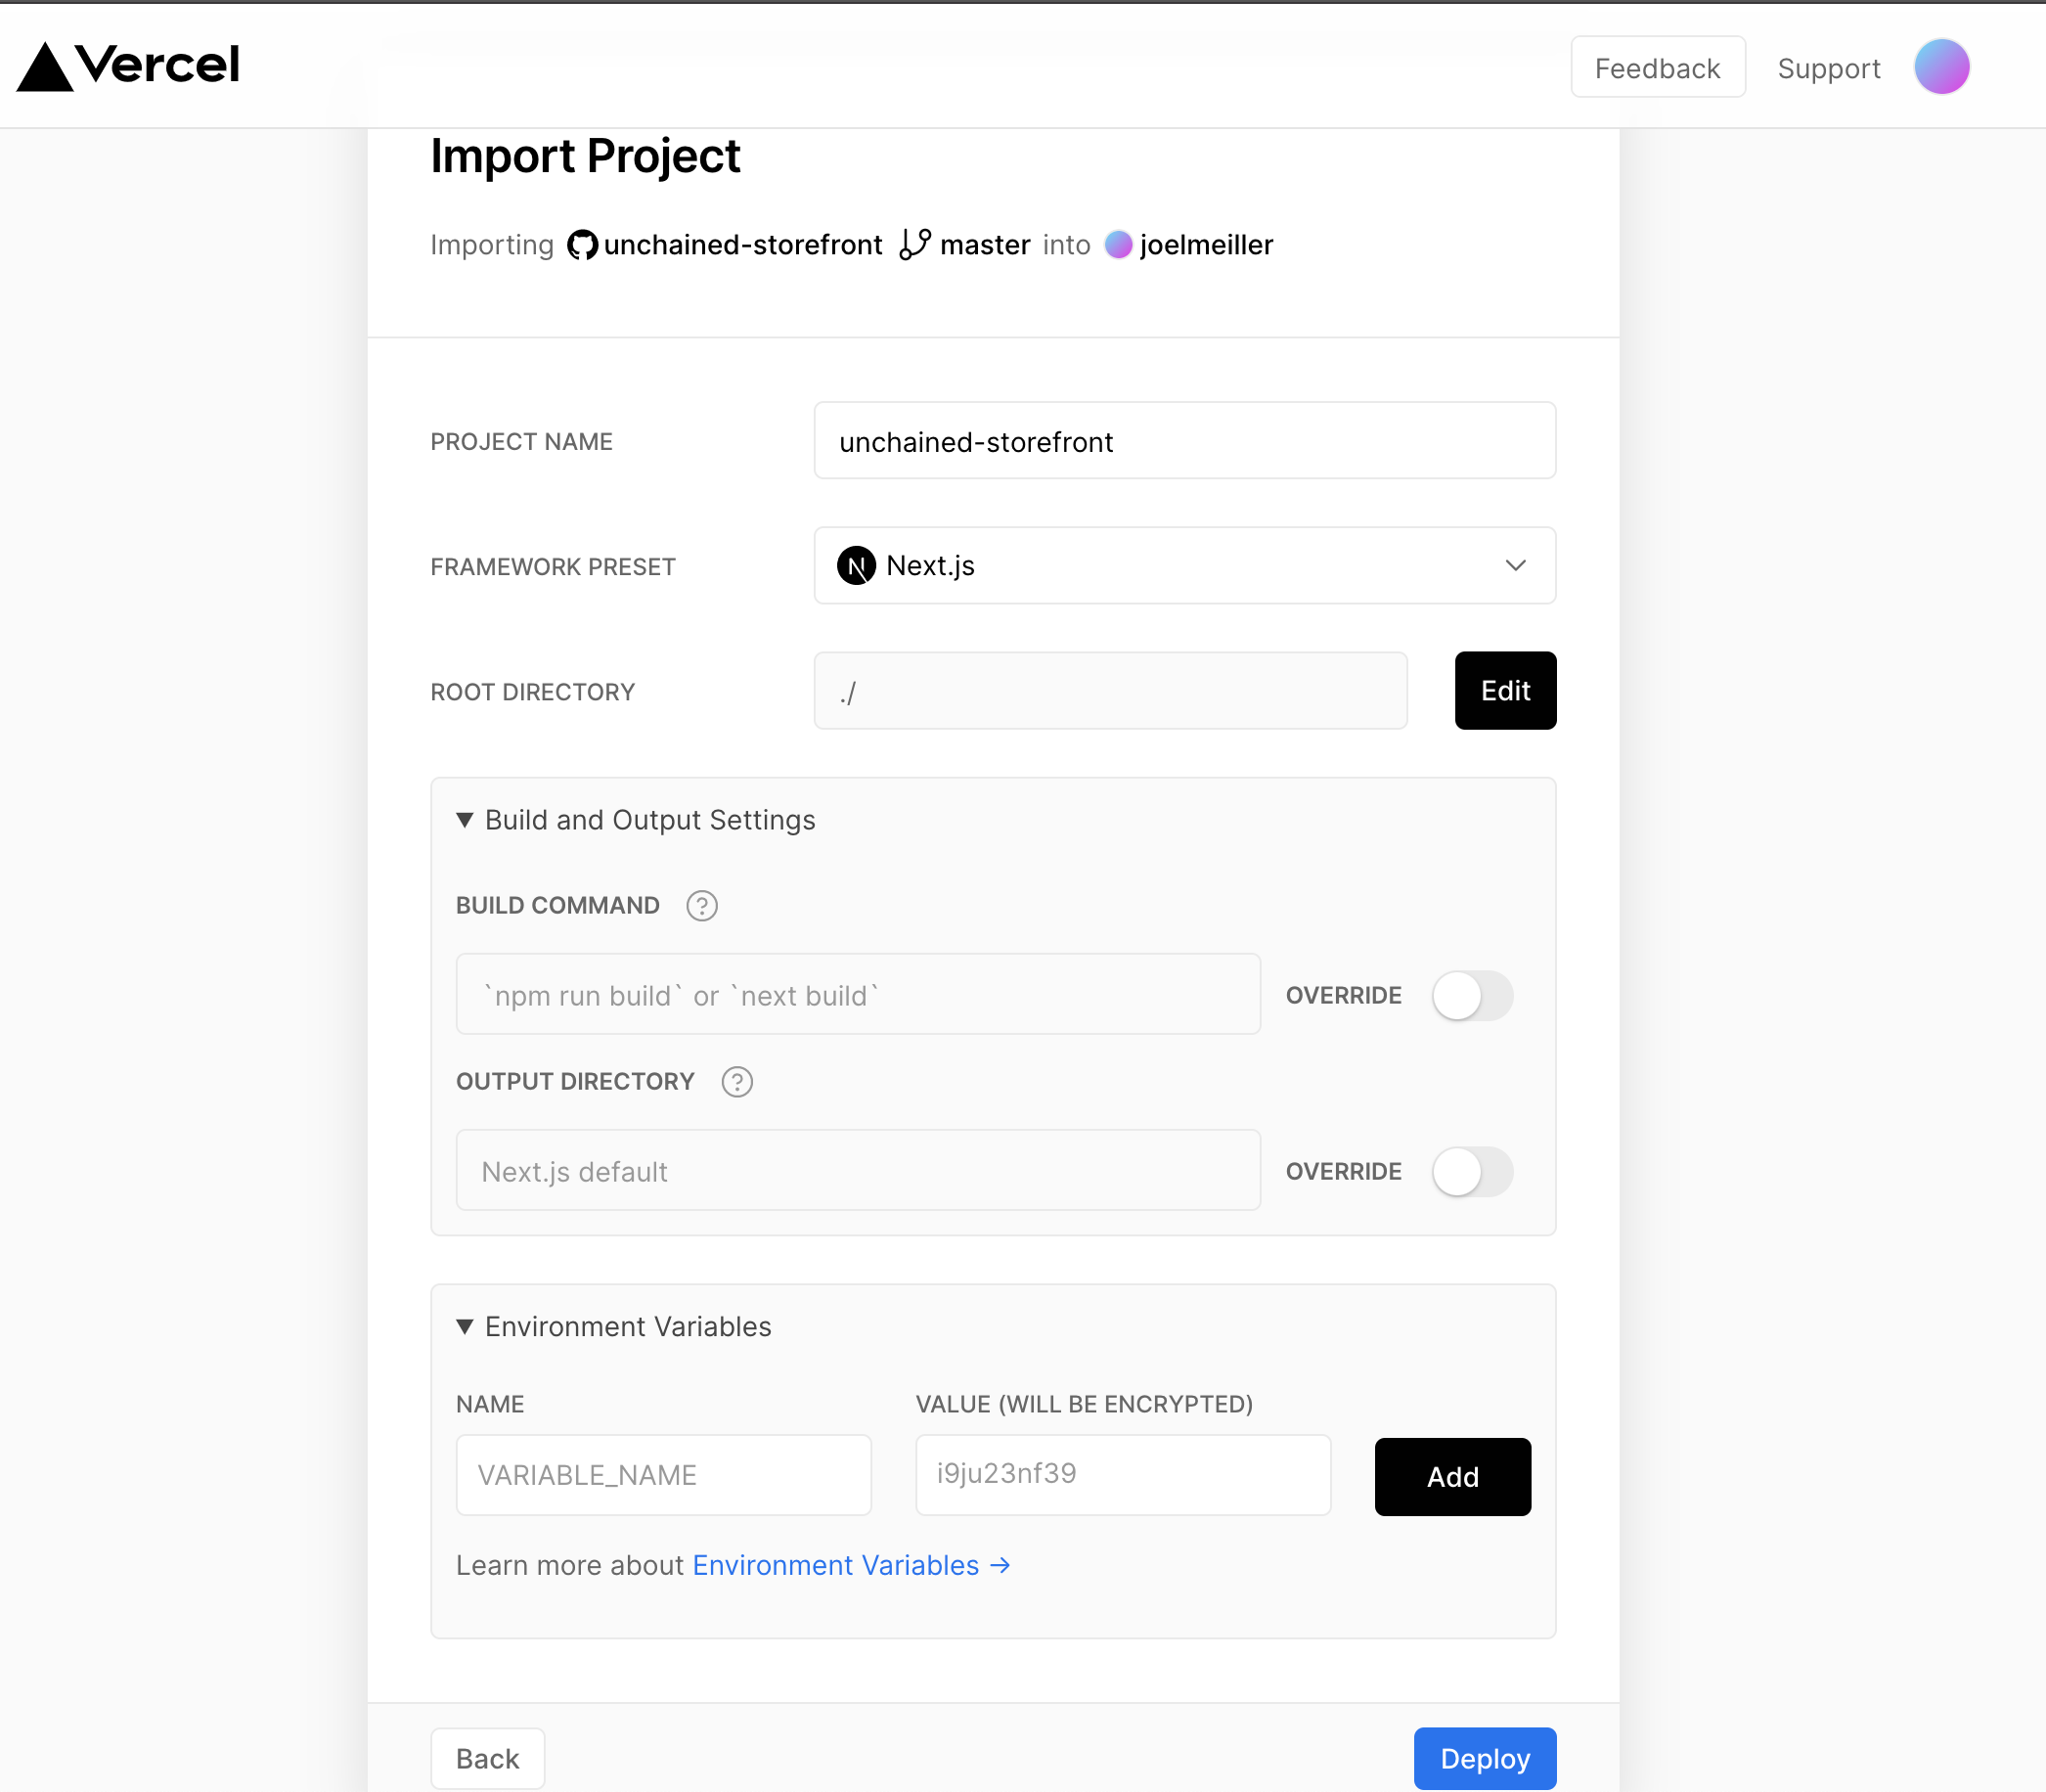
Step 3: Setup and run the deployment
Vercel detects automatically that your project is a Next.js app and will the build and deploy settings for you. No action required. 😎
However, we need to set the UNCHAINED_ENDPOINT in the Environment Variables section.
| NAME | VALUE |
|---|---|
| UNCHAINED_ENDPOINT | https://{HERE COMES THE DOMAIN OF YOUR UNCHAINED CLOUD HOSTED ENGINE}/graphql |