Setup the Unchained Engine
In this section, we will walk you through the steps required to start up an Unchained Engine API server locally.
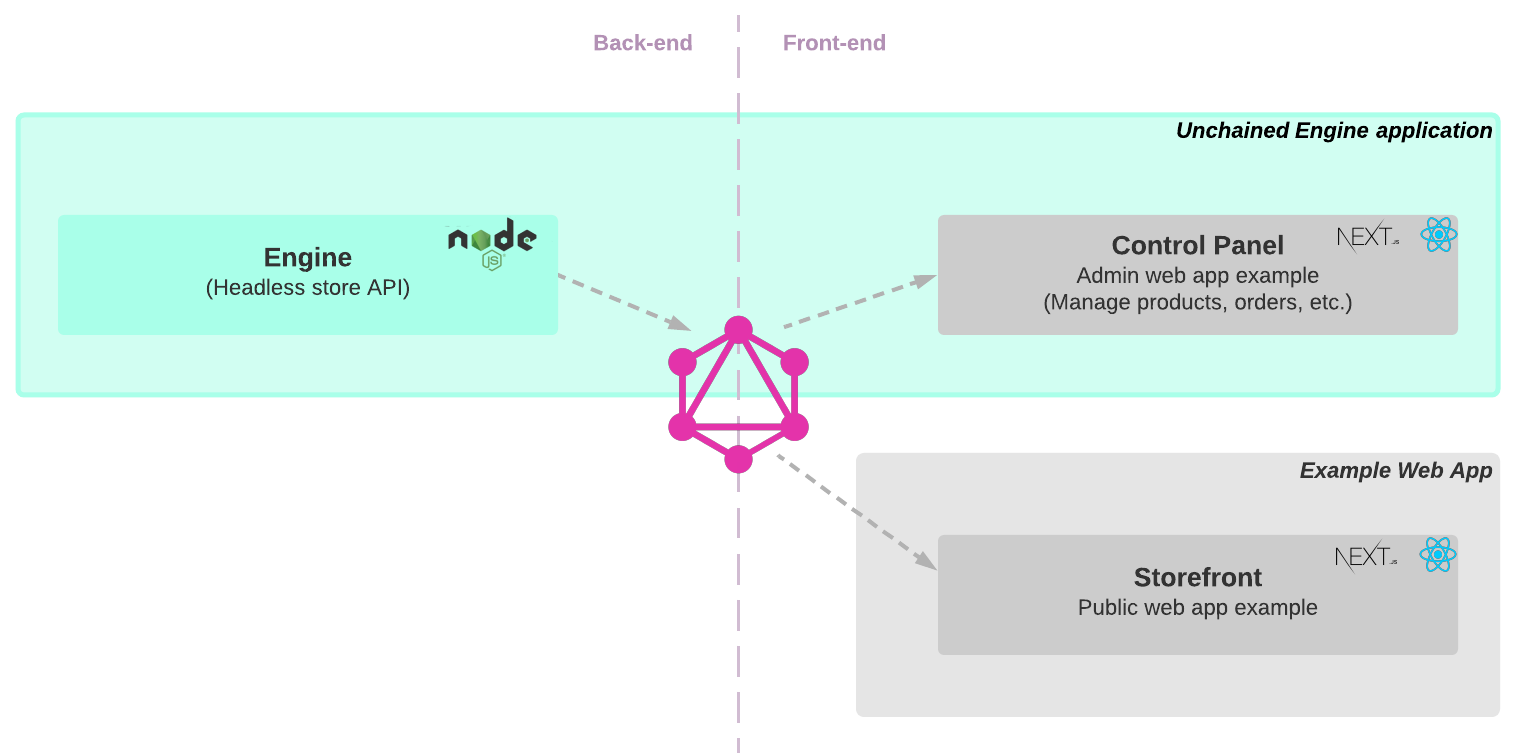
This tutorial helps you:
- Configure and run unchained engine.
- Access the engine through the Admin UI sandbox
- Open the graphQL playground of your local Unchained Engine
.
Step 1: Installation
- First create a new folder for your project to be installed.
mkdir my-unchained-engine
cd my-unchained-engine- Use the Unchained initialization script to download the code.
npm init @unchainedshop- A message prompts you to select the installation template. Choose Unchained engine by using the
down keyand pressenter
? What type of template do you want ›
Full stack e-commerce
Storefront
Unchained engine <--- Next two steps are to select the directory, as we already created a new empty directory you can simply press
enter, and whether you want to initialize git which is up to you.
? Directory name relative to current directory
 (press Enter to use current directory) ›
? Do you want Initialize git? no / yes- Make sure your node version is 16+ and install the npm packages
npm installThe installation script downloads, installs and initialises all files and packages required to build and run unchained engine.
Step 2: Start the Unchained Engine
npm run devOpen localhost:4010 to check if your unchained engine is running correctly. You should see the following Landing page in your browser
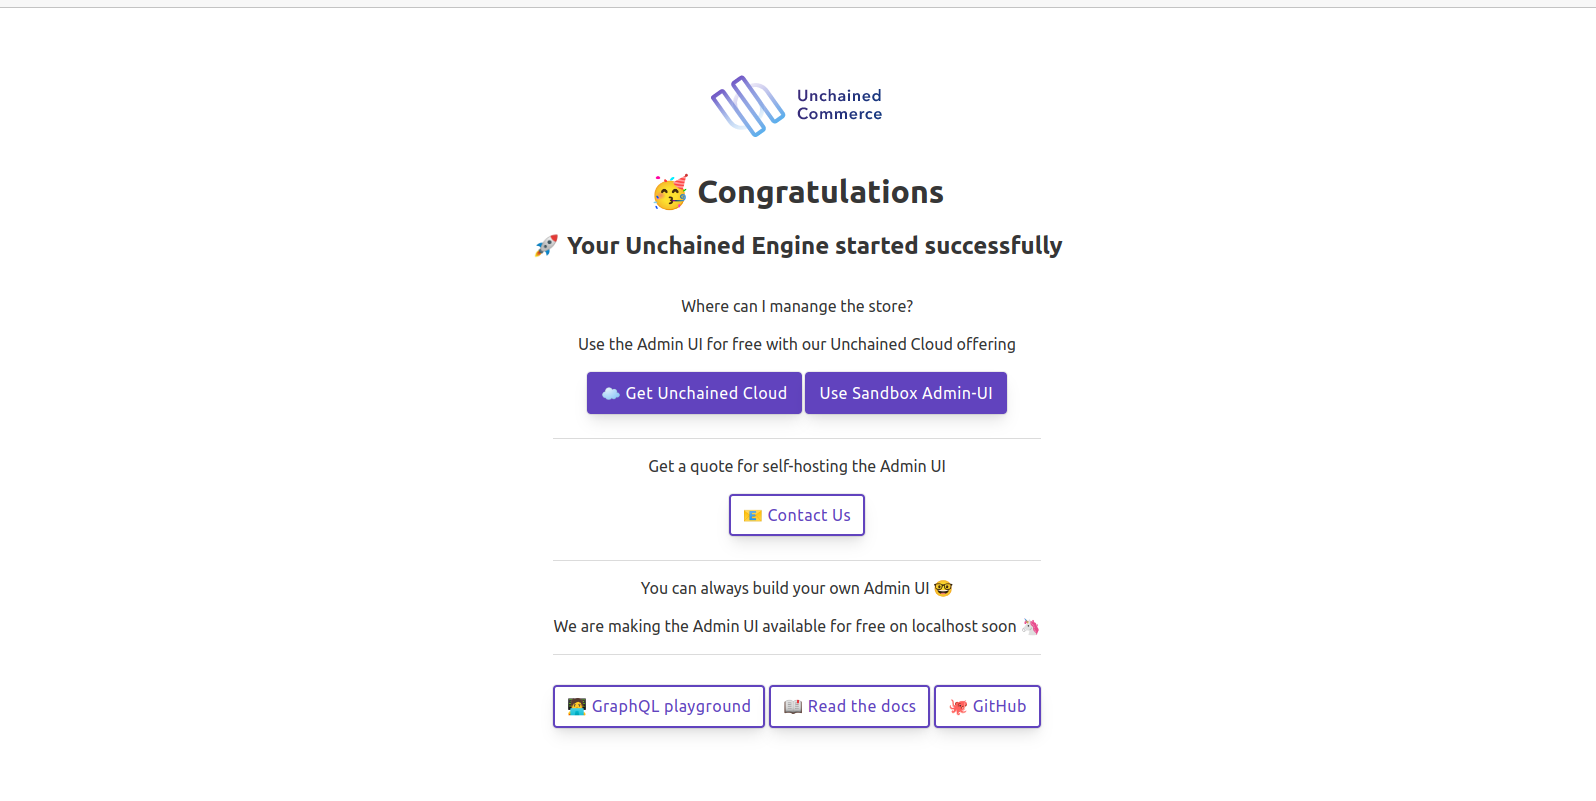
Open Admin UI sandbox
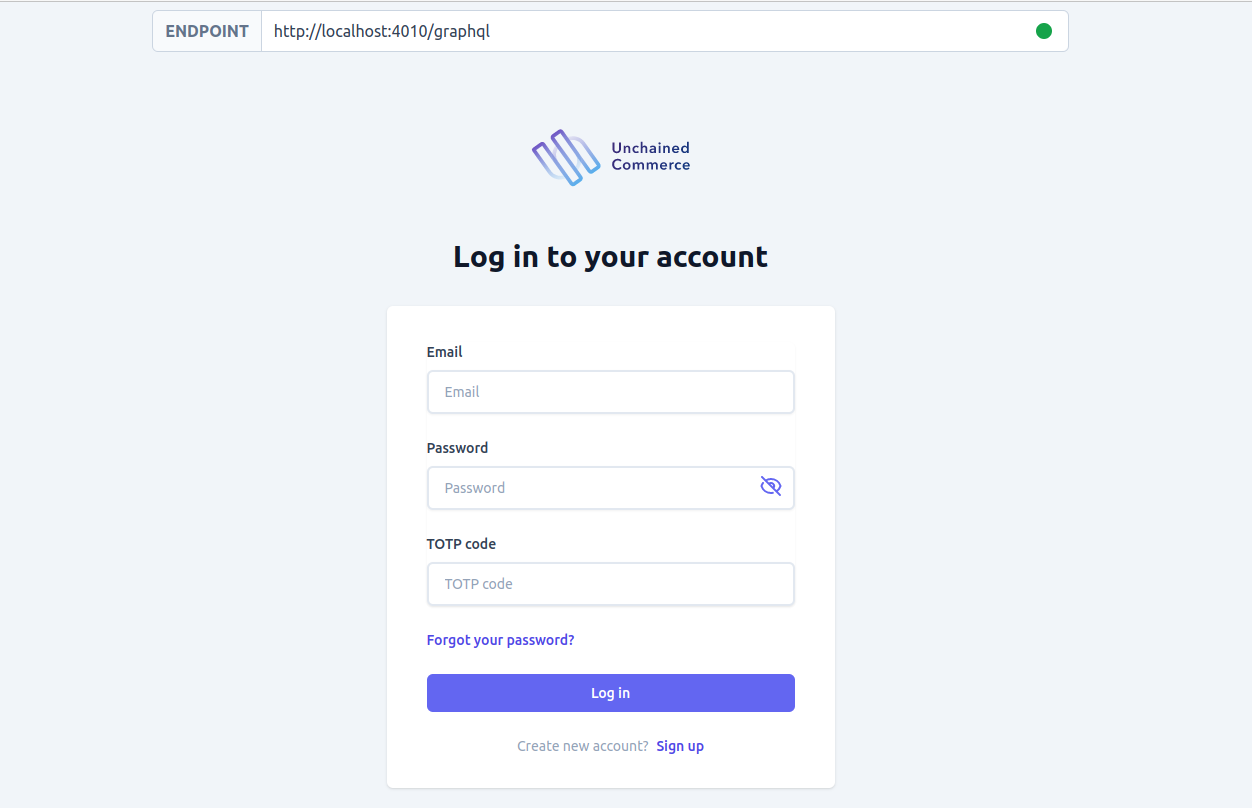
On the initial landing page there are various options you can choose including Use sandbox Admin UI. Click on that button to mange you local engine instance using the admin ui sandbox, it will redirect you to a login page, use the below credentials to login into the engine and make sure to change the credentials as soon as possible
Username: admin@unchained.local
Password: password
You can also click on Graphql playground to opens the GraphQL playground for you to easily execute queries and mutations.
Step 3: Add Products
If you want to set up the store and add products and categories using the admin UI follow the instruction of the Getting-Started guide using your local admin UI instance under localhost:4010.
Follow the examples to learn about how to add products, initiate a check-out and use plugins with GraphQL.
Next steps
An easy way to test the Unchained Engine is to setup the test storefront web app created with React.js and Next.js locally and connect our local Unchained Engine GraphQL API to it which is covered in the next chapter.